Title: The Art and Science of Sewing PVC Patches onto Shoes: A Comprehensive Guide
Introduction
In the realm of fashion and footwear customization, the incorporation of PVC (Polyvinyl Chloride) patches has emerged as a trendsetting technique, blending durability with aesthetic appeal. PVC patches, known for their vibrant colors, weather resistance, and flexibility, have found a niche in enhancing the visual and functional aspects of shoes. This article delves deep into the art and science of sewing PVC patches onto shoes, exploring everything from the fundamental principles to advanced techniques, materials required, design considerations, and the impact of this craftsmanship on the footwear industry. Whether you’re a DIY enthusiast, a professional shoe designer, or simply someone fascinated by the intricacies of shoe customization, this guide aims to be your comprehensive resource.
Section 1: Understanding PVC Patches
1.1 What are PVC Patches?
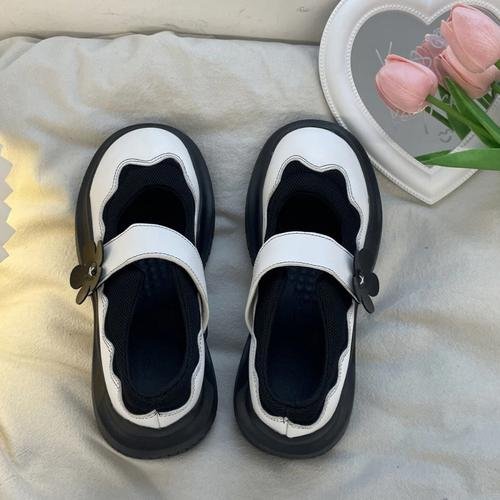
PVC patches are embellishments made from a type of plastic known as Polyvinyl Chloride. These patches are highly versatile, capable of being molded into various shapes and sizes, and can be easily colored or printed with intricate designs. Their durability and water-resistant nature make them ideal for outdoor and sports footwear, where they not only add a stylistic touch but also enhance the shoe’s lifespan.
1.2 Benefits of Using PVC Patches on Shoes
- Durability: PVC patches are resistant to wear and tear, ensuring that the design remains intact even with regular use.
- Customization: The ability to print or emboss intricate designs makes PVC patches a favorite for personalization.
- Weather Resistance: They can withstand exposure to moisture, making them suitable for all-weather conditions.
- Lightweight: Despite their robustness, PVC patches are light, ensuring they don’t add unnecessary weight to the shoes.
- Cost-Effective: Compared to other materials, PVC offers a good balance between cost and quality.
Section 2: Materials and Tools Needed
2.1 PVC Patch Material
Choosing the right PVC material is crucial. It should be flexible yet sturdy, easy to cut and sew, and compatible with the shoe’s fabric. Different thicknesses and textures are available, each suited to specific types of shoes and designs.
2.2 Sewing Essentials
- Sewing Machine: A reliable machine capable of handling multiple layers of fabric and PVC.
- Threads: Strong, polyester threads are recommended for their durability and resistance to UV rays.
- Needles: Select needles suitable for sewing through both fabric and PVC. Universal or sharp-point needles work best.
- Scissors: A pair of sharp scissors for cutting the PVC patches and fabric accurately.
- Adhesive: Optional, but a good adhesive can help secure the patch in place before sewing.
- Measuring Tools: Rulers, markers, and templates for precise measurements and design placement.
2.3 Additional Tools
- Heat Press: For applying heat-activated adhesives or to flatten out any wrinkles in the PVC.
- Design Software: If creating custom designs, software like Adobe Illustrator can be used to draft and print designs onto the PVC.
- Cutting Mat and Blade: For precise cutting of intricate designs.
Section 3: Preparing the Shoe and Patch
3.1 Cleaning the Shoe
Before attaching the PVC patch, ensure the shoe’s surface is clean and free of debris. Use a mild cleaner and allow the shoe to dry completely.
3.2 Designing and Cutting the Patch
Using your design software, create the desired patch design. Once finalized, print or transfer the design onto the PVC sheet. Carefully cut out the patch using scissors or a cutting blade, ensuring clean edges.
3.3 Pre-Positioning
Place the patch on the shoe where you intend to sew it. Use pins or a temporary adhesive to hold it in place, ensuring it’s aligned correctly.
Section 4: Sewing Techniques
4.1 Hand Sewing vs. Machine Sewing
Discuss the pros and cons of each method. Hand sewing offers more control but is time-consuming, while machine sewing is faster but requires precision in setting up.
4.2 Stitch Types
- Straight Stitch: Best for simple, clean lines.
- Zigzag Stitch: Provides more flexibility and strength, ideal for areas prone to stress.
- Satin Stitch: Offers a decorative finish while ensuring the patch is securely attached.
4.3 Sewing Steps
- Start with a Test Run: Practice on a scrap piece of fabric and PVC to adjust your machine settings.
- Secure the Patch: Begin by sewing along the edges of the patch, using small, tight stitches.
- Reinforce: Add additional stitches in high-stress areas, such as corners or curves.
- Finish: Ensure all edges are neatly sewn, and the patch is flat against the shoe’s surface.
Section 5: Design Considerations
5.1 Color and Pattern Matching
Choose colors and patterns that complement the shoe’s existing design. Consider the shoe’s purpose and the wearer’s personal style.
5.2 Placement
The position of the patch can significantly impact the shoe’s appearance. Common placements include the heel, toe, side panels, or even across the vamp.
5.3 Size and Proportion
Ensure the patch size is proportionate to the shoe. A large patch on a small shoe can overwhelm the design, while a small patch on a large shoe might look insignificant.
This is just the beginning of your 3,000-word article. To expand further, you could include:
- Section 6: Advanced Techniques (e.g., layering patches, incorporating LED lights, using transparent PVC for a unique effect)
- Section 7: Maintenance and Care (how to clean and care for shoes with PVC patches)
- Section 8: Industry Trends and Innovations (exploring new materials, sustainable options, and technological advancements)
- Section 9: Case Studies (highlighting successful examples of PVC patch application in various shoe designs)
- Section 10: DIY Projects and Tutorials (step-by-step guides for beginners)
Remember to keep each section engaging, with a mix of technical information, practical tips, and creative ideas. Good luck with your article!